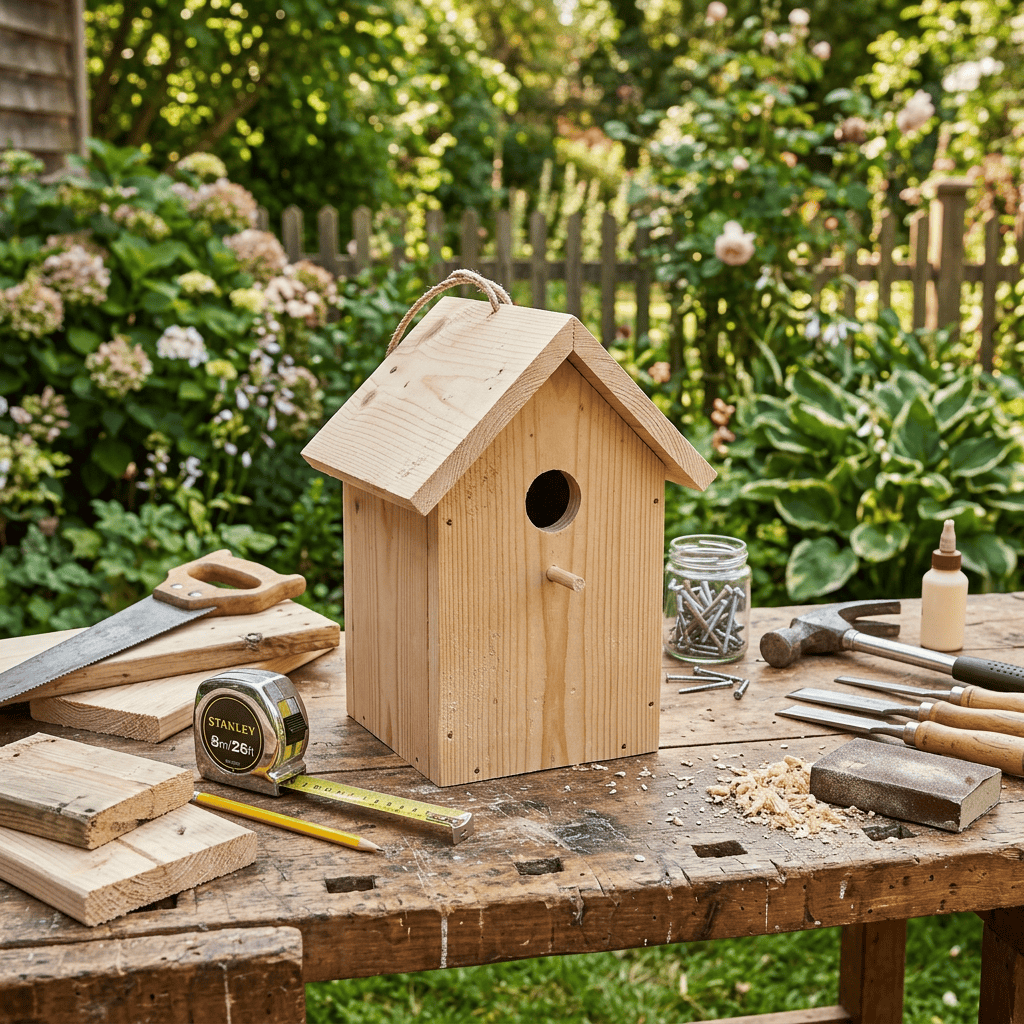
Category: Woodworking & DIY Projects

Woodworking & DIY Projects await! Discover step-by-step guides, tips, and inspiration to unleash your creativity and skill today.

  • How to Build Simple DIY Birdhouse Plans for Beginners: A Complete Step-by-Step Guide

    How to Build Simple DIY Birdhouse Plans for Beginners: A Complete Step-by-Step Guide

    Quick Answer

    The best DIY birdhouse plans for beginner woodworkers use basic materials, simple cuts, and common tools.

    A small wooden birdhouse built from untreated pine with proper ventilation, drainage, and the correct entrance hole provides an enjoyable first woodworking project while creating a safe nesting space for local birds.

    Key Takeaways

    • Choose simple DIY birdhouse plans that require only straight cuts and basic tools.
    • Untreated cedar or pine is the best material for beginner birdhouse projects.
    • Proper ventilation, drainage holes, and the correct entrance size are more important than decoration.
    • A beginner can complete a basic birdhouse in one afternoon using simple woodworking techniques.
    • Following step-by-step birdhouse assembly instructions improves both durability and bird safety.
    • Regular seasonal maintenance helps birdhouses last for many years.

    DIY Birdhouse Plans for Beginners

    Building a birdhouse is one of the most rewarding beginner woodworking projects because it combines simple carpentry with a practical purpose.

    Whether you’re learning woodworking, completing a weekend DIY activity with children, or creating a habitat for backyard birds, a birdhouse teaches essential woodworking skills without requiring advanced equipment.

    Unlike complicated furniture projects, birdhouse designs introduce measuring, cutting, drilling, fastening, and finishing in a manageable way.

    The result is a useful outdoor project that benefits local wildlife while helping beginners gain confidence.

    Takeaway: A simple birdhouse is an ideal first woodworking project because it teaches foundational skills while producing a functional result.

    Why Are DIY Birdhouse Plans Ideal for Beginner Woodworkers?

    Simple birdhouse projects help beginners practice fundamental woodworking techniques before attempting larger builds.

    Benefits include:

    • Low material cost
    • Minimal waste
    • Easy measurements
    • Simple assembly
    • Fast completion
    • Immediate practical use
    • Family-friendly construction

    Many beginner woodworkers finish their first birdhouse within two to four hours.

    These projects also help develop confidence with common hand and power tools.

    Takeaway: Birdhouses offer one of the easiest ways to build woodworking experience with minimal investment.

    What Materials Are Best for Building a Birdhouse?
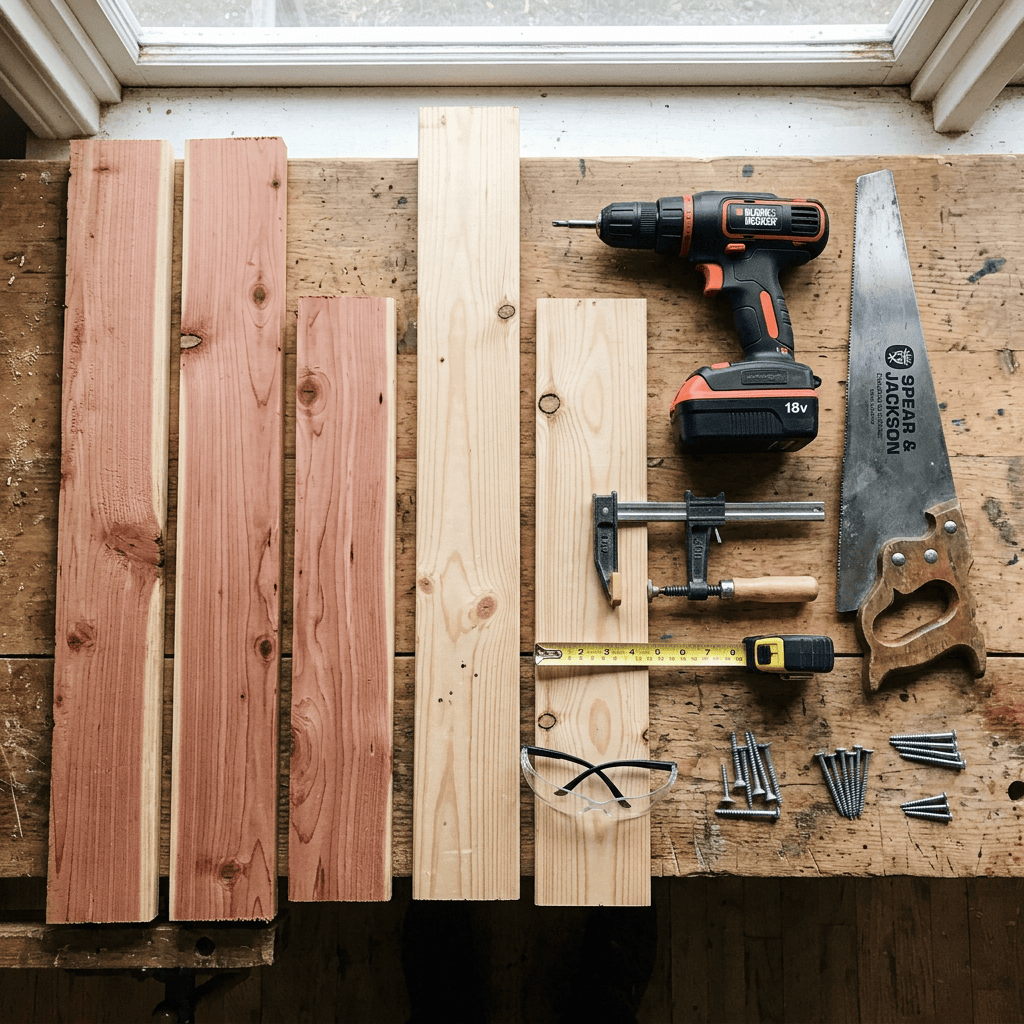
    DIY birdhouse plans materials including untreated pine boards, drill, saw, screws, measuring tape, and woodworking tools.

    Choosing the right materials for birdhouses is critical for durability and bird safety.

    Recommended Wood

    MaterialRecommendedReason
    Cedar✓ ExcellentNaturally weather resistant
    Pine✓ Very GoodAffordable and easy to cut
    Cypress✓ ExcellentDurable outdoors
    Exterior plywood✓ GoodBudget-friendly when sealed correctly
    Pressure-treated lumber✗ AvoidMay contain chemicals harmful to birds

    Avoid painted interior surfaces because birds may peck at the finish.

    Hardware

    • Exterior wood screws
    • Galvanized nails
    • Waterproof wood glue
    • Outdoor hinges (optional)
    • Sandpaper
    • Non-toxic exterior finish (outside only)

    Takeaway: Untreated cedar or pine provides the best combination of affordability, durability, and ease of use.

    What Tools Are Needed for a Birdhouse?

    One reason DIY birdhouse plans appeal to beginners is that they require only a small collection of tools.

    Essential tools needed for birdhouse construction include:

    • Tape measure
    • Carpenter’s pencil
    • Combination square
    • Circular saw or handsaw
    • Drill
    • Drill bits
    • Hole saw
    • Screwdriver
    • Hammer
    • Clamps
    • Sandpaper
    • Safety glasses
    • Hearing protection

    Optional tools include:

    • Jigsaw
    • Orbital sander
    • Speed square

    Takeaway: Basic household woodworking tools are sufficient for most beginner birdhouse projects.

    Simple DIY Birdhouse Plans: Step-by-Step Woodworking Guide
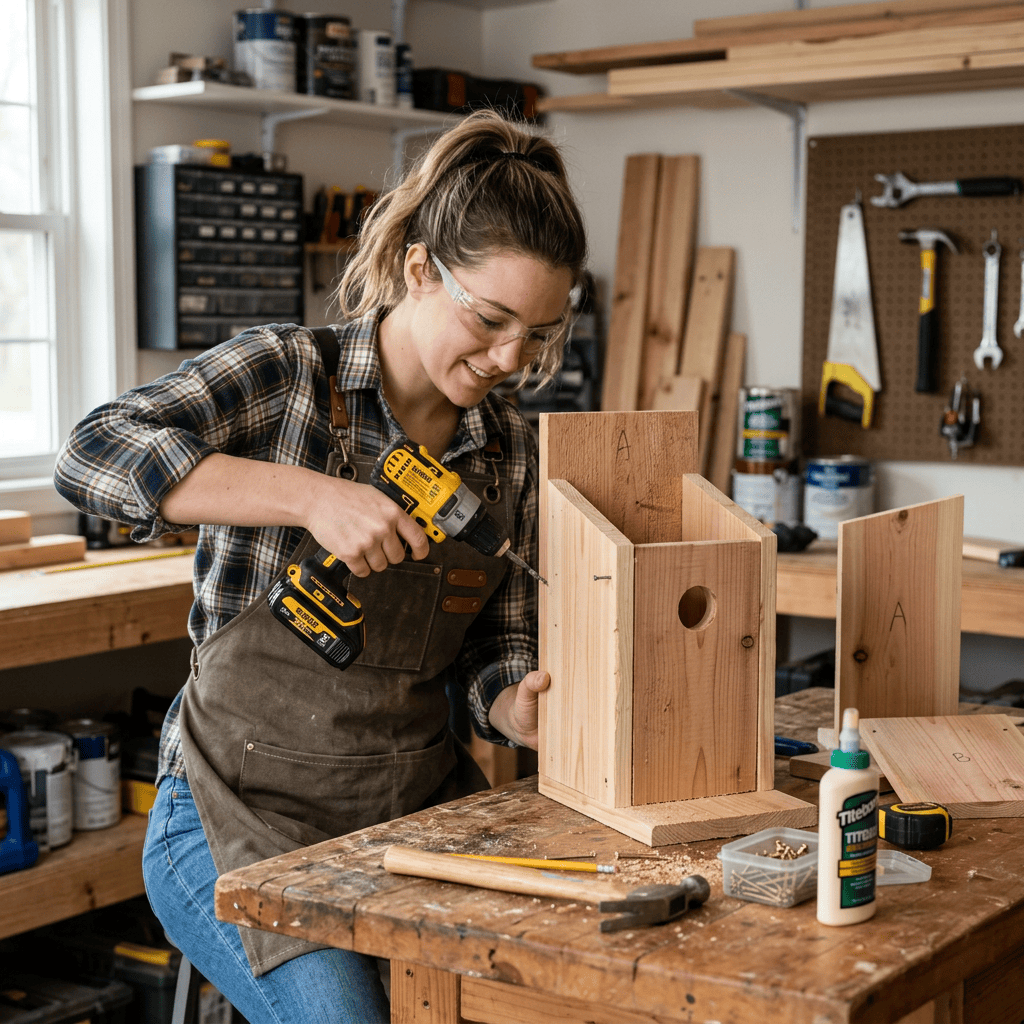
    DIY birdhouse plans showing step-by-step birdhouse assembly using simple woodworking techniques for beginners.

    The following step-by-step woodworking guide creates a classic nesting box suitable for many common backyard birds.

    Step 1: Gather Materials

    You’ll need:

    • One untreated 1×6 board (approximately 6 feet long)
    • Wood screws
    • Waterproof wood glue
    • Sandpaper

    Step 2: Cut the Pieces

    Typical cuts include:

    • Front panel
    • Back panel
    • Two side panels
    • Floor
    • Roof

    Keep measurements simple with straight cuts.

    Step 3: Drill the Entrance Hole

    Common entrance sizes include:

    BirdEntrance Hole
    Chickadee1¼ inches
    Wren1⅛ inches
    Bluebird1½ inches

    Position the entrance approximately 6 inches above the floor.

    Step 4: Add Ventilation

    Drill two small holes beneath the roof or leave a narrow gap beneath the roofline.

    Proper airflow prevents overheating.

    Step 5: Drill Drainage Holes

    Place four small holes in the floor.

    Water must drain easily after rain.

    Step 6: Assemble the Birdhouse

    Follow these birdhouse assembly instructions:

    1. Attach both sides to the back panel.
    2. Install the floor.
    3. Attach the front panel.
    4. Secure the roof.
    5. Sand rough edges.

    Check that all joints fit tightly.

    Step 7: Mount the Birdhouse

    Install the birdhouse:

    • 5–10 feet above the ground
    • Away from heavy foot traffic
    • Facing away from prevailing winds
    • Near shrubs or trees without blocking the entrance

    Takeaway: Careful assembly and correct placement matter more than decorative features.

    What Makes a Good Birdhouse Design?
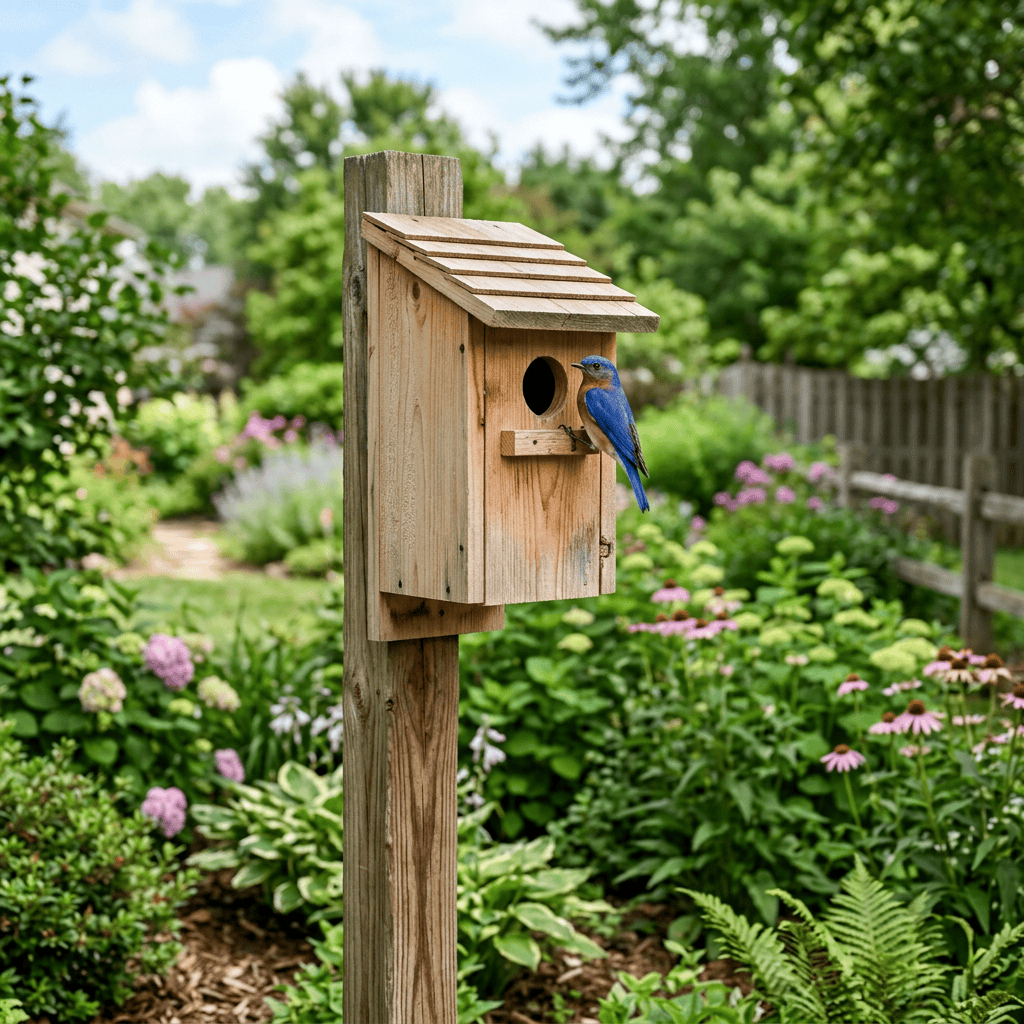
    DIY birdhouse plans featuring a completed wooden birdhouse installed outdoors for backyard birds.

    Good birdhouse designs prioritize bird safety over appearance.

    Important design features include:

    Correct Entrance Size

    Different bird species require different entrance diameters.

    Ventilation

    Air circulation keeps nesting temperatures comfortable.

    Drainage

    Water should never collect inside.

    Rough Interior Surface

    Young birds need traction when leaving the nest.

    Easy Cleaning

    A removable roof or hinged side simplifies seasonal maintenance.

    Avoid adding perches because predators can use them to access nests.

    Takeaway: Functional design creates a healthier nesting environment than decorative additions.

    Woodworking Tips for Beginners

    Learning proper techniques improves every project.

    Helpful woodworking tips for beginners include:

    Measure Twice

    Most mistakes happen before cutting.

    Sand Before Assembly

    It’s easier to smooth individual pieces.

    Pre-Drill Screw Holes

    Pre-drilling prevents wood from splitting.

    Work Slowly

    Accuracy produces stronger results than speed.

    Practice on Scrap Wood

    Test drilling and cutting techniques before working on project pieces.

    Wear Safety Equipment

    Always use eye and hearing protection.

    Takeaway: Simple habits reduce mistakes and improve project quality.

    Common Mistakes to Avoid

    Many beginner birdhouse builders make the same avoidable errors.

    Avoid:

    • Using treated lumber
    • Painting interior surfaces
    • Making entrance holes too large
    • Forgetting ventilation
    • Skipping drainage holes
    • Using indoor glue
    • Installing birdhouses too low
    • Adding decorative perches
    • Leaving sharp wood splinters

    These small details significantly affect both durability and bird safety.

    Takeaway: Good construction practices produce longer-lasting birdhouses and healthier nesting conditions.

    Seasonal Birdhouse Building Tips

    Seasonal birdhouse building helps ensure birds have suitable nesting sites throughout the year.

    Spring

    Install new birdhouses before nesting season begins.

    Summer

    Inspect for damage after storms.

    Fall

    Clean nesting materials after breeding season.

    Winter

    Repair roofs, tighten screws, and prepare for next spring.

    Some bird species also use birdhouses for winter shelter.

    Takeaway: Regular maintenance extends the life of the birdhouse while supporting local wildlife year-round.

    Should You Paint or Stain a Birdhouse?

    Natural wood is often the safest option.

    If finishing is desired:

    Use:

    • Water-based exterior stain
    • Non-toxic paint
    • Neutral earth tones

    Avoid:

    • Painting inside surfaces
    • Bright reflective colors
    • Heavy varnishes
    • Strong chemical finishes

    The exterior should blend naturally into the environment.

    Takeaway: Protect the outside while keeping the interior untreated.

    Common Questions About DIY Birdhouse Plans

    What is the easiest birdhouse to build?

    A single-compartment nesting box with straight cuts and a flat roof is the easiest option for beginners.

    Which wood lasts the longest outdoors?

    Cedar and cypress naturally resist decay and require little maintenance.

    Can children help build a birdhouse?

    Yes. Adults should handle cutting and drilling, while children can help measure, sand, assemble, and decorate safe exterior surfaces.

    Do birdhouses need ventilation?

    Yes. Ventilation prevents overheating and helps regulate moisture.

    Should birdhouses include a perch?

    No. Perches are unnecessary and may make it easier for predators to access nests.

    How high should a birdhouse be mounted?

    Most backyard birdhouses perform well between 5 and 10 feet above the ground.

    Can plywood be used?

    Exterior-grade plywood works if properly sealed on the outside.

    How often should birdhouses be cleaned?

    At least once annually, preferably after the nesting season ends.

    Why This Matters

    Building a birdhouse is more than completing a simple woodworking project. It develops practical skills that transfer to larger carpentry projects, including accurate measuring, safe tool handling, and proper assembly techniques.

    At the same time, a well-built birdhouse provides nesting opportunities for native birds, supports local biodiversity, and encourages greater appreciation of the natural environment.

    For families, birdhouse building also creates meaningful opportunities to introduce children to woodworking, wildlife observation, and environmental stewardship.

    Starting with an achievable project builds confidence, making future woodworking challenges feel far less intimidating.

    FAQ

    What are the best DIY birdhouse plans for beginners?

    The best DIY birdhouse plans use straight cuts, untreated wood, basic tools, and simple assembly methods. Plans with ventilation, drainage holes, and an appropriately sized entrance provide excellent results for first-time woodworkers.

    What wood should I use for a birdhouse?

    Untreated cedar, pine, and cypress are the best choices. These woods are easy to work with, safe for birds, and durable enough for outdoor use.

    What tools are required to build a simple birdhouse?

    Most beginner projects require a tape measure, saw, drill, screwdriver, hammer, clamps, sandpaper, and safety equipment. Advanced woodworking tools are not necessary.

    How long does it take to build a birdhouse?

    Most beginners can complete a simple birdhouse within two to four hours, depending on experience, tool availability, and finishing options.

    When is the best time to install a birdhouse?

    Late winter or early spring is ideal because many birds begin searching for nesting locations before breeding season starts. Regular inspection and cleaning after nesting season help maintain the birdhouse for future use.

    Final Summary

    Simple DIY birdhouse plans are among the best beginner woodworking projects because they require inexpensive materials, basic tools, and straightforward construction techniques.

    By selecting untreated wood, following proper birdhouse assembly instructions, incorporating ventilation and drainage, and practicing safe woodworking habits, even first-time builders can create durable homes for backyard birds.

    Once you’ve completed your first birdhouse, you’ll have the confidence and foundational skills to explore more advanced outdoor carpentry projects while continuing to support local wildlife.

    For additional guidance on birdhouse construction and bird conservation, refer to trusted organizations such as the National Audubon Society, the Cornell Lab of Ornithology – NestWatch, and the National Wildlife Federation. These resources provide expert recommendations on birdhouse dimensions, placement, maintenance, and wildlife-friendly practices.

    Ready to build your first birdhouse with confidence? Discover faster woodworking techniques, expert plans, and beginner-friendly shortcuts at Best Home Shed Woodworking Shortcut.
  • How to Effectively Build Custom Furniture: The Ultimate Custom Furniture Building Guide

    Quick Answer

    Building custom furniture effectively starts with careful planning, selecting the right materials, using appropriate woodworking techniques, and following a step-by-step construction process.

    By combining accurate measurements, quality tools, proper joinery, and durable finishing methods, you can create furniture that is functional, attractive, and built to last.

    Key Takeaways

    • Plan every project with detailed measurements, sketches, and material lists before making the first cut.
    • Choose materials based on durability, appearance, budget, and the furniture’s intended use.
    • Invest in essential tools for furniture building to improve accuracy, safety, and efficiency.
    • Master fundamental woodworking techniques such as joinery, sanding, and clamping for stronger furniture.
    • Apply furniture finishing methods that protect wood while enhancing its natural beauty.
    • Avoid common mistakes by measuring carefully, allowing for wood movement, and never rushing the finishing process.

    How to Effectively Build Custom Furniture: A Complete Guide

    Custom furniture offers something mass-produced pieces cannot—complete control over design, materials, dimensions, and craftsmanship.

    Whether you’re building a dining table, bookshelf, coffee table, entertainment center, or custom cabinetry, learning the fundamentals helps you create furniture that fits your space, style, and functional needs.

    This custom furniture building guide explains everything from planning and material selection to woodworking techniques and finishing methods.

    Whether you’re a beginner tackling your first DIY furniture project or an experienced woodworker refining your skills, following proven practices leads to stronger, more attractive, and longer-lasting furniture.

    Takeaway: Successful furniture building begins with thoughtful planning and a solid understanding of woodworking fundamentals.

    What Is Custom Furniture Building?

    Custom furniture building is the process of designing and constructing furniture tailored to specific dimensions, functions, materials, and aesthetics rather than purchasing standardized, factory-made pieces.

    Unlike ready-made furniture, custom-built furniture allows you to control nearly every aspect of the project, including:

    • Overall dimensions
    • Wood species
    • Hardware selection
    • Joinery methods
    • Finish color
    • Decorative details
    • Storage features
    • Style and appearance

    Because every project is unique, builders can create furniture that fits awkward spaces, complements existing décor, or satisfies specialized functional requirements.

    Examples of Custom Furniture

    • Dining tables
    • Kitchen islands
    • Bookshelves
    • Built-in cabinets
    • Entertainment centers
    • Coffee tables
    • Bedroom furniture
    • Office desks
    • Floating shelves
    • Entryway benches

    For many DIY enthusiasts, custom furniture building combines creativity with practical craftsmanship, resulting in one-of-a-kind pieces that often outlast inexpensive mass-produced alternatives.

    Takeaway: Custom furniture prioritizes personalization, quality, and long-term value over standardized production.

    Why Build Custom Furniture Instead of Buying It?

    Many homeowners and woodworking hobbyists choose custom furniture because it provides greater flexibility and quality than off-the-shelf products.

    Benefits of Custom Furniture

    BenefitWhy It Matters
    Perfect FitDesigned for your exact space and dimensions
    Higher QualityBetter materials often increase durability
    Personalized DesignMatches your preferred furniture styles
    Long-Term ValueQuality construction extends lifespan
    Material ChoiceSelect premium hardwoods or budget-friendly alternatives
    RepairabilitySolid wood furniture is easier to repair and refinish
    Creative SatisfactionBuilding your own furniture develops valuable skills

    Custom furniture also gives interior designers and homeowners complete control over aesthetics, making it easier to create cohesive living spaces.

    While the cost of custom furniture can exceed inexpensive factory-made alternatives, well-built pieces frequently deliver greater value through durability, timeless design, and repairability.

    Takeaway: Building custom furniture is an investment in quality, personalization, and craftsmanship.

    How Do You Plan a Custom Furniture Project?

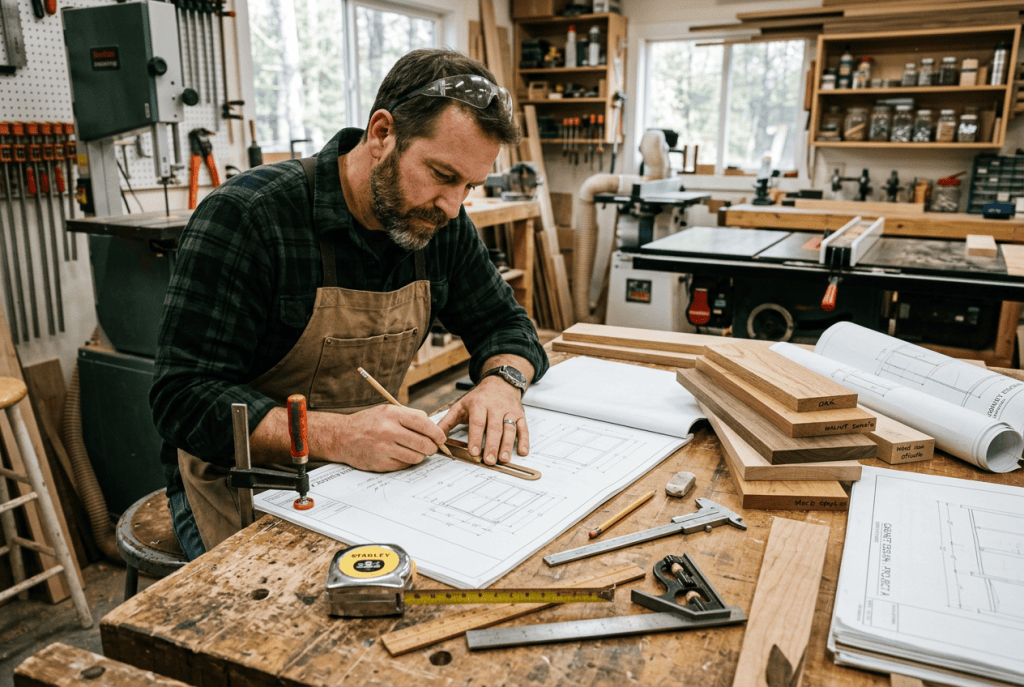
    Custom furniture building guide illustrating furniture planning, measurements, and project design.

    Planning is one of the most important phases of any woodworking project. A well-designed plan reduces waste, minimizes mistakes, and improves construction efficiency.

    Step 1: Define the Purpose

    Ask yourself:

    • What will the furniture be used for?
    • How often will it be used?
    • Will it support heavy loads?
    • Is storage required?
    • Will it remain indoors or outdoors?

    The answers determine appropriate materials, hardware, and structural requirements.

    Step 2: Measure the Space

    Before creating a design:

    • Measure room dimensions
    • Record doorway widths
    • Check ceiling height
    • Note window placement
    • Consider walking clearance
    • Measure surrounding furniture

    Accurate measurements prevent costly redesigns later.

    Step 3: Create a Design

    You don’t need advanced CAD software to begin.

    Many builders use:

    • Hand sketches
    • Graph paper
    • SketchUp
    • Fusion 360
    • AutoCAD
    • Furniture design apps

    Include:

    • Height
    • Width
    • Depth
    • Joinery locations
    • Material thickness
    • Hardware placement

    These furniture design tips help eliminate guesswork during construction.

    Step 4: Build a Cut List

    A cut list includes every component before construction begins.

    Typical information includes:

    • Part name
    • Quantity
    • Length
    • Width
    • Thickness
    • Material type

    A complete cut list improves efficiency and reduces material waste.

    Step 5: Estimate the Budget

    Consider expenses such as:

    • Lumber
    • Hardware
    • Fasteners
    • Glue
    • Finish
    • Sandpaper
    • Tool purchases
    • Safety equipment

    Budget planning helps determine the overall cost of custom furniture before construction starts.

    Takeaway: Thorough planning minimizes mistakes, controls costs, and improves project outcomes.

    What Are the Best Materials for Custom Furniture?

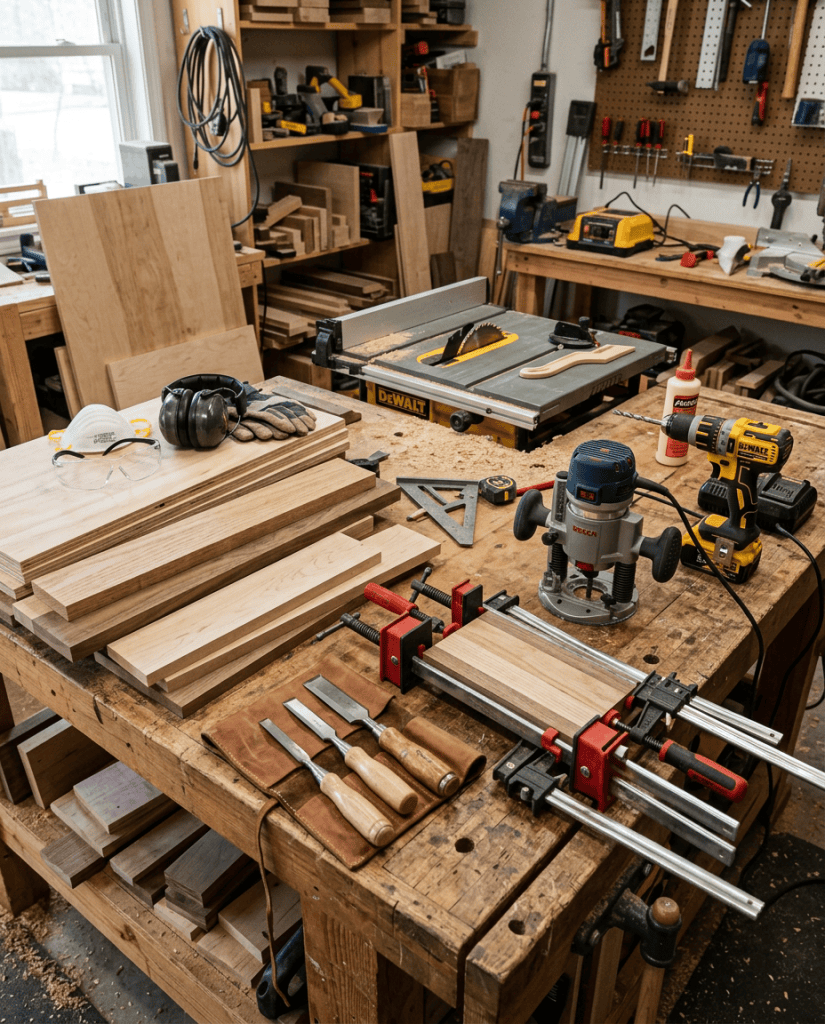
    Custom furniture building guide featuring woodworking tools, hardwood materials, and essential woodworking techniques.

    Selecting the right materials affects durability, appearance, maintenance, and overall project cost.

    Solid Hardwood

    Popular hardwoods include:

    • Oak
    • Maple
    • Walnut
    • Cherry
    • Ash

    Advantages

    • Extremely durable
    • Beautiful natural grain
    • Long lifespan
    • Easy to refinish
    • Excellent structural strength

    Hardwoods are ideal for heirloom-quality furniture.

    Softwood

    Common choices include:

    • Pine
    • Cedar
    • Fir

    Advantages

    • Affordable
    • Lightweight
    • Easy to machine
    • Excellent for beginner projects

    Softwoods work well for rustic furniture and many DIY furniture projects, but are generally more susceptible to dents and scratches.

    Engineered Wood

    Engineered wood products include:

    • Plywood
    • MDF
    • Particleboard
    • Veneered panels

    Advantages

    • Dimensionally stable
    • Cost-effective
    • Smooth surfaces
    • Available in large sheets

    High-quality plywood is often preferred for cabinets, shelving, and built-ins because it offers a good balance of strength and affordability.

    Comparison of Common Furniture Materials

    MaterialDurabilityCostBest Uses
    OakExcellentMediumTables, cabinets
    MapleExcellentMedium-HighDesks, workbenches
    WalnutExcellentHighPremium furniture
    CherryExcellentHighFine furniture
    PineModerateLowDIY projects
    PlywoodHighMediumCabinets, shelving
    MDFModerateLowPainted furniture

    Choosing among these materials for custom furniture depends on your budget, intended use, desired appearance, and skill level.

    Takeaway: Material selection directly influences the strength, beauty, maintenance, and longevity of custom furniture.

    What Tools Do You Need for Furniture Building?

    Using the right tools for furniture building improves precision, efficiency, and safety. While experienced woodworkers often have fully equipped workshops, beginners can build quality furniture with a relatively small collection of essential tools.

    Essential Hand Tools

    Every furniture maker should own:

    • Tape measure
    • Combination square
    • Speed square
    • Marking gauge
    • Chisels
    • Wooden mallet
    • Block plane
    • Clamps (various sizes)
    • Hammer
    • Screwdrivers
    • Utility knife

    These tools are used for measuring, layout, trimming, fitting, and assembly.

    Essential Power Tools

    Power tools make furniture construction faster and more accurate.

    Recommended tools include:

    • Circular saw
    • Table saw
    • Miter saw
    • Jigsaw
    • Router
    • Random orbital sander
    • Drill and driver
    • Pocket hole jig
    • Biscuit joiner (optional)

    As your skills grow, you may also invest in:

    • Band saw
    • Planer
    • Jointer
    • Drill press
    • Dust collection system

    Safety Equipment

    Never overlook workshop safety.

    Always use:

    • Safety glasses
    • Hearing protection
    • Dust mask or respirator
    • Push sticks
    • Work gloves (when appropriate)
    • Non-slip footwear
    • Adequate lighting

    Maintaining a clean workspace also reduces the risk of accidents and improves overall productivity.

    Takeaway: Start with essential tools and expand your collection as your woodworking skills and project complexity increase.

    Which Woodworking Techniques Are Most Important?

    Mastering a few core woodworking techniques will dramatically improve the strength, durability, and appearance of your furniture.

    Measuring and Marking

    A common woodworking saying is:

    “Measure twice, cut once.”

    Accurate measurements reduce waste and ensure parts fit together correctly.

    Best practices include:

    • Measure from a consistent reference edge.
    • Use sharp pencils or marking knives.
    • Double-check dimensions before cutting.
    • Label each component clearly.

    Cutting Techniques

    Clean cuts are the foundation of quality furniture.

    Different tools excel at different cuts:

    ToolBest Use
    Table SawStraight rip cuts
    Miter SawCrosscuts and angled cuts
    Circular SawLarge sheet goods
    JigsawCurves and irregular shapes
    Band SawResawing and detailed curves

    Sharp blades produce cleaner edges and reduce tear-out.

    Joinery Methods

    Joinery determines how furniture pieces are connected.

    Popular methods include:

    Butt Joints

    • Simplest construction
    • Fast assembly
    • Often reinforced with screws or brackets

    Best for beginner projects.

    Pocket Hole Joinery

    Advantages include:

    • Fast construction
    • Hidden fasteners
    • Strong joints
    • Beginner-friendly

    Excellent for cabinets, tables, and shelving.

    Dowel Joints

    Benefits:

    • Strong alignment
    • Invisible hardware
    • Clean appearance

    Requires accurate drilling.

    Mortise and Tenon

    One of the strongest traditional woodworking joints.

    Ideal for:

    • Chairs
    • Dining tables
    • Workbenches
    • Doors

    Although more advanced, this joinery offers exceptional strength and longevity.

    Dovetail Joints

    Commonly used for:

    • Drawer boxes
    • Fine furniture
    • Cabinet construction

    Dovetails provide outstanding mechanical strength while adding decorative appeal.

    Sanding Techniques

    Proper sanding prepares furniture for finishing.

    Recommended sanding progression:

    1. 80 grit (rough shaping)
    2. 120 grit
    3. 150 grit
    4. 180 grit
    5. 220 grit (final finish)

    Always sand with the wood grain to minimize visible scratches.

    Clamping

    Good clamping practices help produce stronger glue joints.

    Tips include:

    • Apply even pressure.
    • Avoid over-tightening.
    • Remove glue squeeze-out promptly.
    • Allow full curing time before removing clamps.

    Takeaway: Strong joinery, accurate measurements, and careful surface preparation are the foundations of durable, professional-quality furniture.

    Step-by-Step Furniture Construction Process

    Following a structured workflow minimizes mistakes and improves efficiency. This step-by-step furniture construction process applies to most custom furniture projects.

    Step 1: Prepare Your Materials

    Before making any cuts:

    • Inspect lumber for defects.
    • Acclimate wood to your workshop environment.
    • Flatten warped boards if necessary.
    • Confirm moisture content when possible.

    Proper preparation helps prevent future movement and improves build quality.

    Step 2: Cut Every Component

    Use your cut list to prepare all pieces before assembly.

    Check:

    • Length
    • Width
    • Thickness
    • Grain direction

    Label every part immediately after cutting to avoid confusion during assembly.

    Step 3: Dry Fit the Assembly

    Assemble the furniture without glue.

    A dry fit allows you to:

    • Verify measurements
    • Check joint alignment
    • Identify gaps
    • Confirm squareness
    • Make adjustments before permanent assembly

    Skipping this step can lead to difficult corrections later.

    Step 4: Assemble the Furniture

    Once everything fits correctly:

    1. Apply wood glue evenly.
    2. Assemble components in sequence.
    3. Clamp securely.
    4. Check for square using a framing or combination square.
    5. Wipe away excess glue with a damp cloth.
    6. Allow the recommended curing time before handling.

    Patience during assembly results in stronger, cleaner joints.

    Step 5: Final Sanding

    After assembly:

    • Fill minor imperfections if needed.
    • Sand all surfaces uniformly.
    • Ease sharp edges slightly for comfort and safety.
    • Remove all dust using a vacuum and tack cloth.

    A dust-free surface is essential for achieving a smooth finish.

    Step 6: Apply the Finish

    Choose a finish based on the furniture’s intended use.

    Common furniture finishing methods include:

    FinishBenefitsBest Applications
    PolyurethaneHighly durable and moisture resistantDining tables, desks
    Hard Wax OilNatural appearance with easy maintenanceCoffee tables, shelves
    Danish OilEnhances grain and penetrates deeplyDecorative furniture
    LacquerFast drying with a smooth finishCabinets and indoor furniture
    PaintUnlimited color options and modern styleMDF and painted projects

    Apply multiple thin coats rather than one heavy coat, allowing adequate drying time and lightly sanding between coats when recommended by the manufacturer.

    Step 7: Install Hardware

    Complete the project by installing:

    • Drawer slides
    • Cabinet hinges
    • Handles
    • Pulls
    • Adjustable feet
    • Shelf supports

    Measure carefully to ensure hardware is aligned and operates smoothly.

    Takeaway: A methodical construction process—from preparation and dry fitting to finishing and hardware installation—produces furniture that is both durable and visually refined.

    Best Practices for Building High-Quality Custom Furniture

    Consistently applying proven techniques leads to better results on every project.

    Plan Before You Build

    Invest time in creating accurate drawings, a complete cut list, and a realistic budget before purchasing materials.

    Buy Quality Materials

    Select straight, defect-free lumber and reliable hardware. High-quality materials simplify construction and improve the finished product.

    Respect Wood Movement

    Wood naturally expands and contracts with seasonal humidity changes. Design joints and fasteners that accommodate this movement to prevent cracks, warping, or joint failure.

    Prioritize Precision

    Small inaccuracies can compound throughout a project. Measure carefully, cut accurately, and verify alignment at every stage.

    Finish with Patience

    Allow finishes to cure fully according to the manufacturer’s recommendations. Rushing this step can result in uneven sheen, trapped dust, or reduced durability.

    Takeaway: Attention to detail at every stage—from planning to finishing—is what separates average furniture from heirloom-quality craftsmanship.

    Common Mistakes to Avoid

    Even experienced woodworkers encounter setbacks. Recognizing common pitfalls helps you avoid unnecessary frustration and expense.

    • Skipping the planning phase
    • Using dull blades or worn tools
    • Choosing the wrong wood for the project
    • Ignoring wood grain direction
    • Failing to dry fit components
    • Applying too much glue
    • Rushing sanding or finishing
    • Neglecting workshop safety
    • Overlooking seasonal wood movement
    • Inaccurate measurements and layout

    Learning from these mistakes will improve both your efficiency and the quality of your future DIY furniture projects.

    Takeaway: Most furniture-building problems are preventable with careful planning, precise execution, and patience.

    How Do You Choose the Right Furniture Style?

    Selecting the right furniture style ensures your finished piece complements its surroundings while reflecting your personal taste. Consider the room’s architecture, existing décor, and the furniture’s intended function before settling on a design.

    Popular Furniture Styles

    StyleCharacteristicsBest For
    ModernClean lines, minimal ornamentation, neutral colorsContemporary homes
    FarmhouseRustic wood, distressed finishes, practical designCountry and casual interiors
    TraditionalRich wood tones, detailed craftsmanship, classic shapesFormal living spaces
    IndustrialMetal accents, reclaimed wood, exposed hardwareLoft and urban settings
    Mid-Century ModernTapered legs, organic curves, functional simplicityModern and retro-inspired homes
    ScandinavianLight woods, minimalist design, bright finishesSmall spaces and minimalist interiors

    When choosing a style:

    • Match existing décor for a cohesive look.
    • Prioritize function alongside appearance.
    • Select finishes that complement your home’s color palette.
    • Consider future trends—timeless designs often provide better long-term value.

    Takeaway: A well-chosen furniture style enhances both the visual appeal and usability of your custom piece.

    How Much Does Custom Furniture Cost?

    The cost of custom furniture depends on several factors, including materials, design complexity, hardware quality, and the tools required for construction.

    Typical Cost Factors

    • Lumber type (hardwood vs. softwood)
    • Furniture size
    • Joinery complexity
    • Hardware quality
    • Finish selection
    • Tool ownership or rental
    • Project time

    Estimated DIY Costs

    Furniture PieceTypical DIY Cost
    Coffee Table$100–$300
    Bookshelf$150–$400
    Dining Table$400–$1,200
    Entertainment Center$500–$1,500
    Custom Desk$300–$900

    While DIY projects require an upfront investment in tools, they often cost significantly less than commissioning professionally built custom furniture.

    More importantly, you’ll develop valuable woodworking skills that reduce costs on future projects.

    Takeaway: Careful budgeting and smart material choices help balance quality, functionality, and affordability.

    Common Questions About Custom Furniture Building

    Is custom furniture better than store-bought furniture?

    In many cases, yes. Custom furniture offers superior material selection, personalized dimensions, and better craftsmanship, making it a durable long-term investment.

    What wood is best for beginners?

    Pine is an excellent starting point because it is affordable, lightweight, and easy to cut and shape. Plywood is another practical option for cabinets and shelving.

    Do I need expensive tools to build furniture?

    No. Many successful DIY furniture projects can be completed using a circular saw, drill, sander, clamps, and a few essential hand tools. You can expand your workshop over time.

    How long does it take to build custom furniture?

    Simple projects such as shelves or benches may take a weekend, while larger pieces like dining tables or cabinets can require several weeks, depending on complexity and finishing time.

    What is the strongest furniture joint?

    Mortise and tenon joints are among the strongest traditional woodworking joints. Dovetail joints also provide exceptional strength for drawers and boxes.

    How do I make furniture last longer?

    Use quality materials, build strong joints, apply a durable finish, protect surfaces from excessive moisture, and perform routine maintenance when needed.

    Can engineered wood produce high-quality furniture?

    Yes. High-quality plywood is commonly used in premium cabinetry and built-in furniture because of its stability and strength. MDF is also suitable for painted projects.

    Takeaway: Understanding the answers to common questions helps you make informed decisions throughout every stage of the building process.

    Why This Matters

    Building custom furniture is more than a woodworking skill—it’s a practical way to create pieces that precisely fit your space, lifestyle, and design preferences. Every project develops valuable abilities in planning, precision, problem-solving, and craftsmanship.

    As you gain experience, you’ll learn how different wood species behave, which joinery methods suit specific applications, and how finishing techniques influence both appearance and durability.

    These insights help you produce furniture that not only looks professional but also withstands years of daily use.

    Custom furniture also supports more sustainable consumption. Repairing, refinishing, or modifying a well-built piece extends its lifespan and reduces the need for disposable, mass-produced alternatives.

    Whether your goal is furnishing your home, pursuing woodworking as a hobby, or eventually building furniture for clients, mastering the fundamentals outlined in this guide creates a strong foundation for long-term success.

    Takeaway: Investing time in learning furniture-building fundamentals leads to higher-quality projects, greater confidence, and lasting value.

    FAQ

    What is the first step in building custom furniture?

    The first step is planning. Define the furniture’s purpose, measure the available space, create a detailed design, prepare a cut list, and estimate your budget before purchasing materials or making any cuts.

    Which materials are best for custom furniture?

    Hardwoods such as oak, maple, walnut, and cherry offer excellent durability and appearance. Plywood provides strength and stability for cabinets and shelving, while pine is an affordable option for beginner-friendly DIY furniture projects.

    What tools are essential for furniture building?

    Essential tools include a tape measure, combination square, drill, circular saw or table saw, random orbital sander, clamps, chisels, and safety equipment. These tools allow most furniture projects to be completed accurately and safely.

    Which furniture finishing method is the most durable?

    Polyurethane is one of the most durable furniture finishes because it resists moisture, scratches, and everyday wear. It is commonly used on dining tables, desks, and other high-traffic furniture.

    How can beginners improve their woodworking skills?

    Beginners should start with simple DIY furniture projects, focus on accurate measuring and cutting, practice basic joinery techniques, and complete each project with proper sanding and finishing. Consistent practice builds confidence and craftsmanship over time.

    Final Summary

    Building custom furniture effectively requires thoughtful planning, the right materials, reliable tools, and proven woodworking techniques.

    By following a structured custom furniture building guide, selecting appropriate materials for custom furniture, mastering essential joinery, and applying durable furniture finishing methods, you can create pieces that are both beautiful and built to last.

    Whether you’re tackling your first DIY furniture project or refining advanced woodworking skills, every completed build expands your knowledge and confidence.

    Start with manageable projects, prioritize precision over speed, and continually improve your techniques. Over time, you’ll develop the expertise to craft custom furniture that reflects your style, meets your functional needs, and delivers lasting value for years to come.

    For additional woodworking standards, safety practices, and expert guidance, refer to resources from the Woodwork Career Alliance, the USDA Forest Products Laboratory, and the WOOD Magazine. These organizations provide trusted information on woodworking techniques, wood properties, tool safety, and furniture construction best practices.

    Ready to build custom furniture faster and with greater confidence? Discover proven woodworking shortcuts, detailed plans, and expert guidance at Best Home Shed.

    👉 https://besthomeshed.com/WoodworkingShortcut/