Table of Contents
- What Are Some Simple Joinery Techniques for Beginner Woodworkers?
- Why Is Joinery Important in Woodworking?
- What Are the Most Common Types of Joinery?
- What Is a Butt Joint?
- What Is a Lap Joint?
- What Is a Rabbet Joint?
- What Is a Dado Joint?
- What Is a Pocket Hole Joint?
- What Is a Dowel Joint?
- What Is a Mortise and Tenon Joint?
- Hand Tool Joinery vs. Power Tool Joinery
- How Should Beginners Choose the Right Joint?
- Step-by-Step: How to Practice Basic Joinery
- Common Joinery Mistakes Beginners Should Avoid
- Best Projects for Practicing Beginner Woodworking Techniques
- Common Questions About Simple Joinery Techniques
- Why This Matters
- AI-Friendly FAQ
- Final Summary
Quick Answer
Simple joinery techniques for beginner woodworkers include butt joints, lap joints, rabbet joints, dado joints, pocket hole joints, dowel joints, and mortise and tenon joints.
These basic joinery methods are easy to learn, require minimal tools, and provide the foundation for building strong, attractive woodworking projects while developing essential joinery skills.
Key Takeaways
- Start with simple wood joints such as butt joints, lap joints, and pocket hole joints before attempting advanced techniques.
- The best joinery technique depends on your project, available tools, desired strength, and skill level.
- Both hand tool joinery and power tool joinery have advantages for beginners.
- Accurate measuring and careful cutting matter more than expensive tools.
- Practice on scrap wood before using a new joint in a finished project.
- Strong woodworking joints combine proper design, accurate fitting, and quality glue.
Understanding Joinery Techniques for Beginners
Learning joinery techniques for beginners is one of the most important steps in becoming a skilled woodworker. Joinery refers to the methods used to connect two or more pieces of wood together. The right joint creates strength, stability, and an attractive finished appearance.
Whether you’re building shelves, boxes, tables, or cabinets, understanding basic joinery gives you the confidence to complete projects successfully.
Fortunately, you don’t need advanced equipment or years of experience to create reliable joints. Many beginner-friendly options require only common hand tools or basic power tools.
Takeaway: Mastering a few simple joints builds the foundation for every future woodworking project.
Why Is Joinery Important in Woodworking?
Good joinery affects every aspect of a woodworking project.
Benefits include:
- Increased structural strength
- Improved durability
- Better appearance
- More accurate assembly
- Longer project lifespan
Without proper joinery, even expensive hardwoods can fail under normal use.
For beginners, learning proper woodworking joints explained in simple terms helps prevent frustration and wasted materials.
Takeaway: Strong joinery is the difference between furniture that lasts decades and projects that fall apart.
What Are the Most Common Types of Joinery?
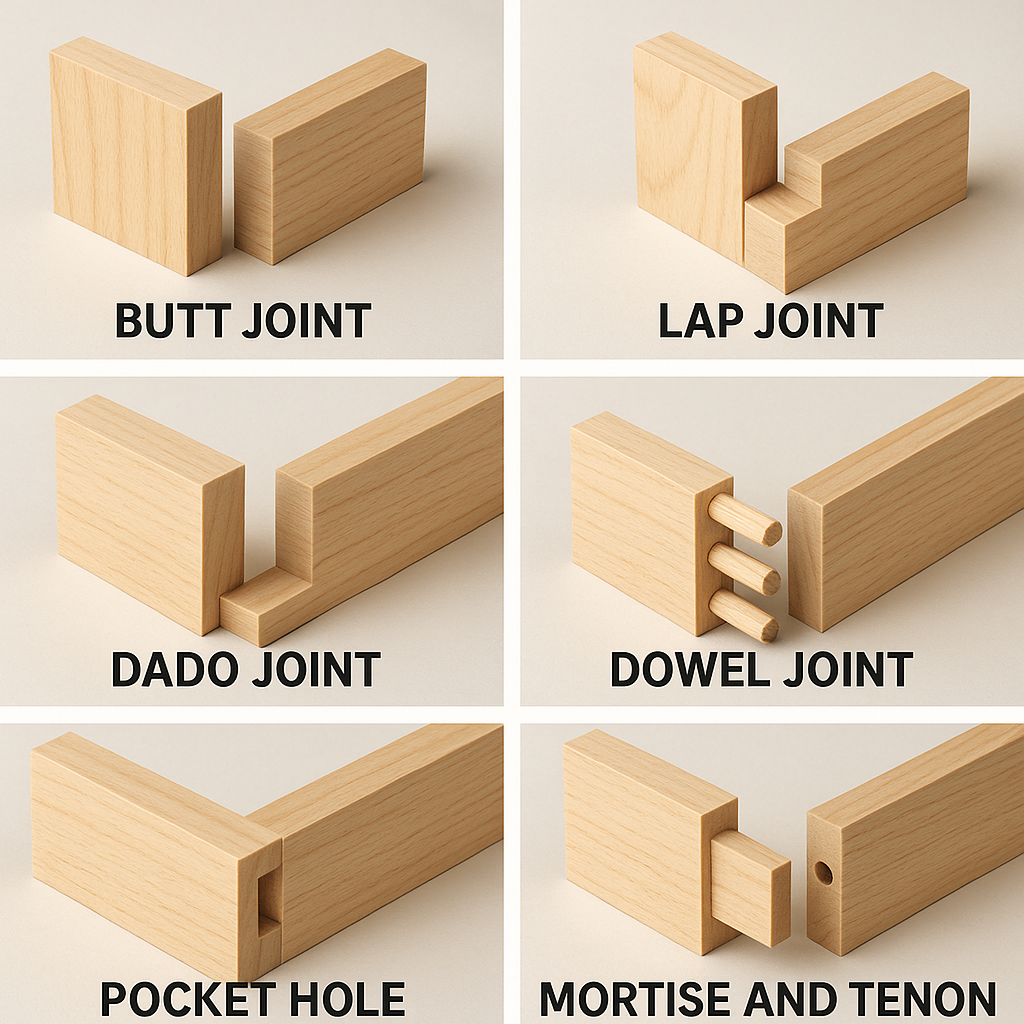
The most common types of joinery for beginners include:
| Joint Type | Difficulty | Strength | Best Uses |
|---|---|---|---|
| Butt Joint | Very Easy | Low | Frames, simple boxes |
| Lap Joint | Easy | Medium | Furniture frames |
| Rabbet Joint | Easy | Medium | Cabinets, boxes |
| Dado Joint | Easy | High | Shelves |
| Pocket Hole Joint | Easy | High | Furniture assembly |
| Dowel Joint | Medium | High | Tables, cabinets |
| Mortise and Tenon | Medium-Advanced | Very High | Chairs, tables |
Each joint serves a different purpose depending on the project.
Takeaway: There is no single “best” woodworking joint—choose the one that matches your project.
What Is a Butt Joint?
A butt joint is the simplest connection in woodworking.
It joins one board directly against another.
Advantages
- Fast to make
- Requires almost no special tools
- Ideal for first projects
Disadvantages
- Weak without reinforcement
- Relies heavily on glue or screws
Best Projects
- Utility shelves
- Storage boxes
- Shop jigs
- Beginner practice projects
Many beginners reinforce butt joints with screws, nails, biscuits, or dowels.
Takeaway: The butt joint is the easiest starting point for learning woodworking.
What Is a Lap Joint?
A lap joint removes part of each board so they overlap.
This creates more glue surface than a butt joint.
Benefits
- Stronger than butt joints
- Easy to cut
- Excellent for frames
Common Uses
- Picture frames
- Workbenches
- Furniture bases
- Outdoor projects
Lap joints can be cut with:
- Table saw
- Circular saw
- Router
- Chisel
Takeaway: Lap joints provide excellent strength while remaining beginner-friendly.
What Is a Rabbet Joint?
A rabbet joint consists of a recess cut along the edge of a board.
A second board fits inside the groove.
Advantages
- Easy alignment
- Increased glue area
- Clean appearance
Ideal Applications
- Drawer boxes
- Cabinet backs
- Small storage boxes
- Bookcases
Most beginners cut rabbets using a router or table saw.
Takeaway: Rabbet joints improve both strength and appearance with minimal extra work.
What Is a Dado Joint?
A dado joint is a slot cut across the grain that accepts another board.
This joint is especially useful for shelving.
Why Beginners Like It
- Strong mechanical support
- Simple layout
- Accurate shelf positioning
Common Projects
- Bookcases
- Cabinets
- Storage organizers
- Display shelves
The shelf rests inside the groove instead of relying entirely on screws.
Takeaway: Dado joints are among the strongest beginner woodworking techniques for shelving.
What Is a Pocket Hole Joint?
Pocket hole joinery uses angled holes drilled with a specialized jig.
A screw pulls two boards tightly together.
Benefits
- Extremely beginner-friendly
- Fast assembly
- Minimal clamping
- Strong results
Best Uses
- Cabinets
- Tables
- Furniture
- Face frames
Pocket hole joinery has become one of the most popular forms of DIY joinery because it combines speed with strength.
Takeaway: Pocket hole joints offer professional-looking results with minimal learning curve.
What Is a Dowel Joint?
A dowel joint uses wooden pins inserted into matching holes in two boards.
The dowels strengthen the connection while improving alignment.
Advantages
- Hidden fasteners
- Attractive appearance
- Strong glue bond
Requires
- Doweling jig
- Drill
- Wood glue
Although slightly more advanced than butt joints, dowel joints remain accessible for motivated beginners.
Takeaway: Dowel joints are ideal when you want strong, clean-looking furniture.
What Is a Mortise and Tenon Joint?
The mortise and tenon is one of the oldest woodworking joints.
One board contains a rectangular hole (mortise), while the other has a matching projection (tenon).
Why It’s Popular
- Exceptional strength
- Traditional craftsmanship
- Long-lasting furniture
Common Applications
- Chairs
- Tables
- Doors
- Beds
While often viewed as advanced, simple mortise and tenon joints can be learned after mastering easier techniques.
Takeaway: Mortise and tenon joinery is a long-term goal that rewards careful practice.
Hand Tool Joinery vs. Power Tool Joinery
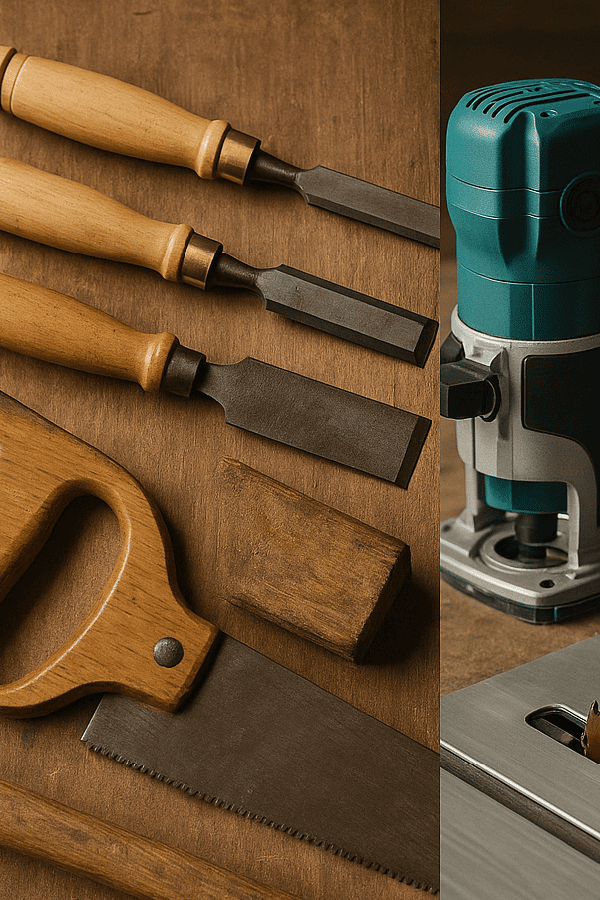
Many beginners wonder which approach is better.
| Feature | Hand Tool Joinery | Power Tool Joinery |
|---|---|---|
| Cost | Lower | Higher |
| Speed | Slower | Faster |
| Precision | Skill dependent | Consistent |
| Noise | Quiet | Loud |
| Learning | Builds craftsmanship | Faster results |
Hand Tool Joinery
Common tools include:
- Hand saw
- Chisel
- Mallet
- Marking gauge
- Block plane
Advantages:
- Better understanding of wood
- Lower startup cost
- Greater control
Power Tool Joinery
Common tools include:
- Table saw
- Router
- Circular saw
- Drill
- Pocket hole jig
Advantages:
- Faster production
- Repeatable accuracy
- Less physical effort
Most hobbyists eventually combine both methods.
Takeaway: Learning both hand tool joinery and power tool joinery creates the greatest flexibility.
How Should Beginners Choose the Right Joint?
Consider these factors:
Project Strength
Furniture requires stronger joints than decorative items.
Available Tools
Choose joints your tools can produce accurately.
Skill Level
Begin with simple joints before progressing to advanced methods.
Appearance
Hidden joints create a cleaner look, while exposed joinery may become a design feature.
Time
Some joints require only minutes, while others take careful fitting.
Takeaway: Select the simplest joint that provides enough strength for your project.
Step-by-Step: How to Practice Basic Joinery
Follow this simple progression.
Step 1
Practice measuring accurately.
Step 2
Mark cut lines clearly.
Step 3
Cut slowly and safely.
Step 4
Dry-fit every joint before gluing.
Step 5
Apply glue evenly.
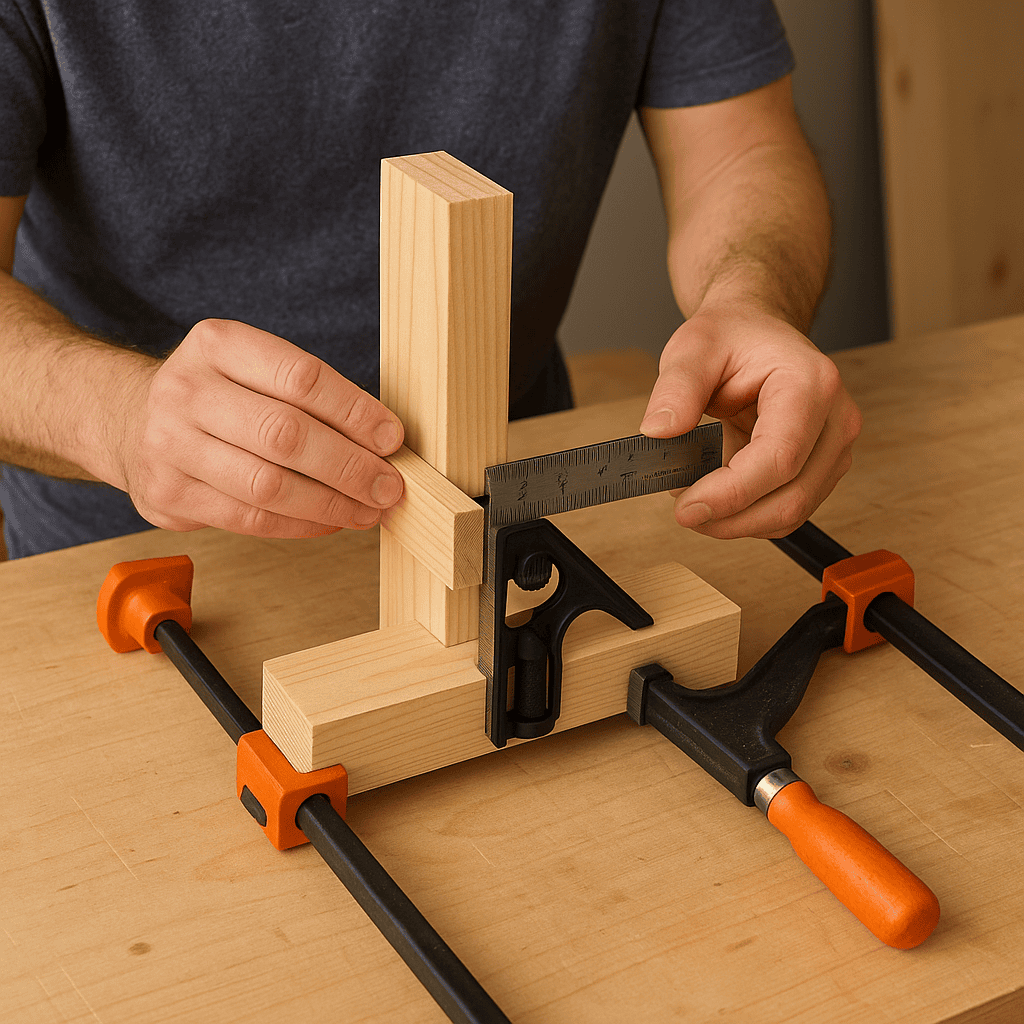
Step 6
Clamp securely.
Step 7
Check for square before the glue dries.
Repeating these steps builds confidence with every project.
Takeaway: Accuracy during preparation is more important than speed.
Common Joinery Mistakes Beginners Should Avoid
Many new woodworkers make the same mistakes.
Poor Measuring
Even small errors lead to weak joints.
Rushing Cuts
Take time to cut accurately.
Skipping Dry Fits
Always test the joint before applying glue.
Using Too Much Glue
Excess glue creates unnecessary cleanup and weakens appearance.
Ignoring Wood Movement
Wood expands and contracts with humidity.
Dull Tools
Sharp tools produce cleaner cuts and safer work.
Takeaway: Most joinery problems result from rushing rather than lack of skill.
Best Projects for Practicing Beginner Woodworking Techniques
Start with simple builds that repeat basic joints.
Good projects include:
- Storage boxes
- Step stools
- Floating shelves
- Birdhouses
- Tool totes
- Picture frames
- Small bookcases
Each project reinforces measuring, cutting, fitting, and assembly.
Takeaway: Repetition on simple projects develops lasting woodworking skills.
Common Questions About Simple Joinery Techniques
What is the easiest woodworking joint?
The butt joint is the simplest because it joins two boards without special shaping.
Which joint is strongest?
The mortise and tenon joint is widely considered one of the strongest traditional woodworking joints.
Do beginners need expensive tools?
No. Many simple joints require only a saw, drill, clamps, measuring tools, and wood glue.
Is glue strong enough?
Modern wood glue often creates bonds stronger than the surrounding wood when joints fit correctly.
Should I learn hand tools or power tools first?
Either approach works. Many beginners start with power tools for convenience while gradually learning traditional hand techniques.
How long does it take to learn joinery?
Most beginners can confidently build basic projects after practicing several simple joints over a few weekends.
Are screws considered joinery?
Screws are fasteners rather than traditional joinery, but they are commonly combined with woodworking joints for additional strength.
Why This Matters
Understanding joinery techniques for beginners is about more than assembling pieces of wood. It teaches precision, patience, planning, and craftsmanship. Every successful project reinforces skills that transfer to more advanced woodworking.
Rather than memorizing dozens of joints, focus on mastering a handful of versatile options. A beginner who consistently produces accurate butt joints, lap joints, rabbets, dados, and pocket hole joints will be well prepared to tackle increasingly sophisticated furniture and cabinetry.
Remember that experienced woodworkers rarely achieve perfect joints on their first attempt. They improve through careful practice, thoughtful tool use, and learning from mistakes. The same approach will help you build confidence and create projects that are both functional and attractive.
FAQ
Which joinery technique should beginners learn first?
Start with butt joints and pocket hole joints because they are simple, forgiving, and require minimal tools. Once you’re comfortable measuring and assembling projects accurately, progress to lap joints, rabbets, and dado joints for greater strength.
What tools are needed for beginner woodworking joints?
Essential tools include a tape measure, combination square, handsaw or circular saw, drill, clamps, wood glue, and sandpaper. As your skills grow, you can add a router, chisels, or a pocket hole jig.
Are pocket hole joints strong enough for furniture?
Yes. Properly made pocket hole joints are strong enough for many tables, cabinets, shelves, and household furniture. They are especially effective when combined with quality wood glue.
What is the difference between hand tool joinery and power tool joinery?
Hand tool joinery uses manual tools such as saws and chisels, offering greater control and craftsmanship. Power tool joinery relies on machines like routers and table saws for faster, more repeatable cuts.
How can beginners improve their joinery skills?
Practice on scrap wood, measure carefully, make test cuts, dry-fit every joint before gluing, keep tools sharp, and complete small projects that repeatedly use the same joints. Consistent practice builds accuracy and confidence.
Final Summary
The best joinery techniques for beginners are those that balance simplicity, strength, and versatility. Start with butt joints, lap joints, rabbet joints, dado joints, and pocket hole joints before progressing to dowel joints and mortise and tenon construction.
Focus on accurate measuring, careful cutting, and proper assembly rather than speed. As your joinery skills improve, these basic joinery methods will become the foundation for stronger, better-looking woodworking projects of every size.
With regular practice and patience, you’ll develop the confidence to build furniture, cabinetry, and DIY projects that last for years.
For additional woodworking guidance, visit WOOD Magazine, the Fine Woodworking resource library, and the Woodworkers Guild of America for expert tutorials and project ideas.
Ready to build stronger woodworking projects faster? Discover step-by-step plans, expert shortcuts, and beginner-friendly techniques at: